 In part 1 of 2 of our series on PVI Conquest, we will highlight some of the important features of the Conquest line by PVI. We will also show some of the basic steps used to set up the water heater. We will show how to adjust the setpoint, adjust time/date, and set the water heater with the proper vent type.
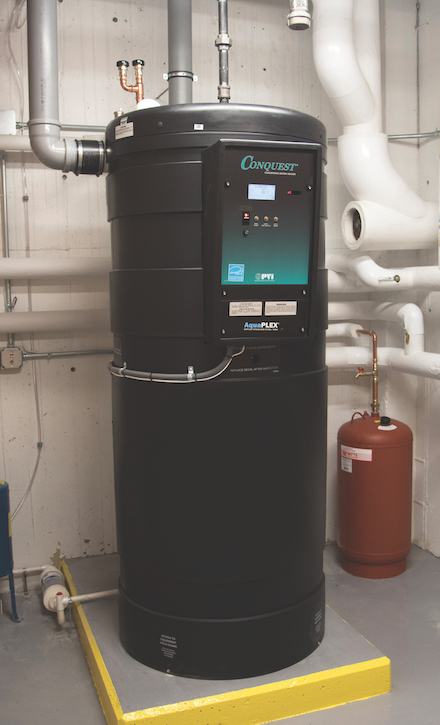
PVI Conquest Water Heater Basics
PVI Conquest is a compact, condensing, semi-instantaneous, firetube water heater that combines an advanced fuel-saving design with extended product life. It features a submerged combustion chamber and a heat exchanger with a dimpled array of firetubes fabricated entirely from durable, corrosion-resistant AquaPLEX duplex stainless steel alloy. Built from the best materials, Conquest provides superior payback with 3-5 times the warranty of competitors.
Features and Benefits of PVI Conquest Water Heater
- Up to 97% thermal efficiency
- Seamless modulation reduces cycling and improves efficiency up to 99% during low load
- Compact footprint
- Exceptionally quiet operation
- Natural or LP gas; Less than 20 ppm NOx, ANSI/CSA compliant gas trains include a second safety shutoff value and gas pressure regulator
- Sealed combustion, category IV venting; direct vents 100 eq. feet or more
- Touch-screen operating control with plain text status and fault diagnostics
AquaPLEX Corrosion Protection
- Highly durable AquaPLEX engineered duplex stainless steel storage tank and heat exchanger.
- Corrosion-resistant in potable water at any temperature
- Highly resistant to chloride stress corrosion cracking
- No lining required
- Non-ferrous, removable tank connections
- No anode rods required or used
Warranty
- 15-year AquaPLEX tank and heat exchanger corrosion warranty (8 years full, 7 years prorated)
- One-year parts and labor warranty
PVI Water Heater How-To
View Menu (Home Screen – Default Display)
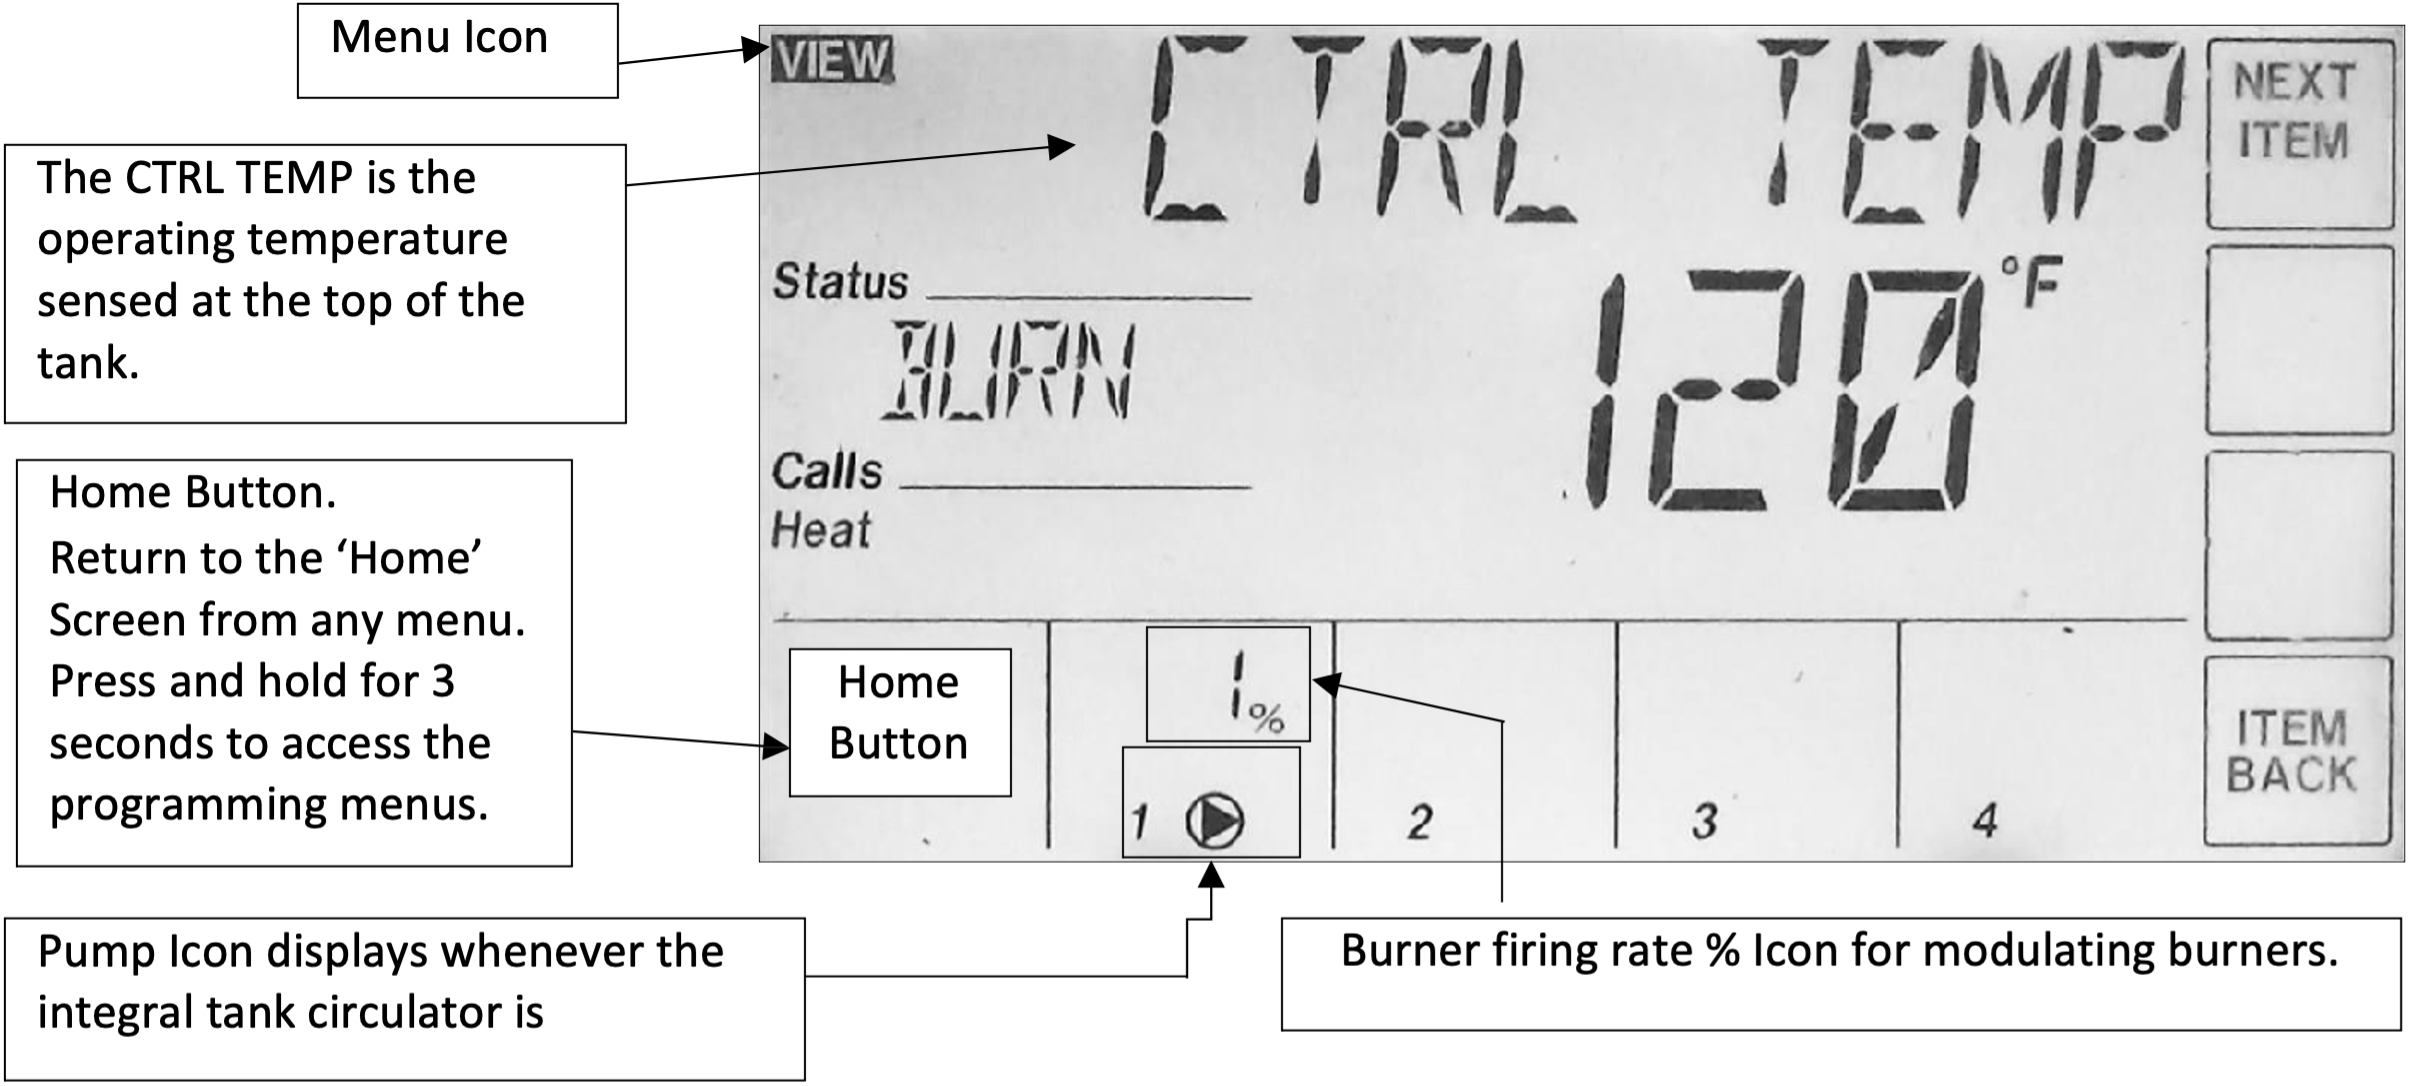
The View Menu is the default display (home screen) of the EOS control system. The View Menu displays general information about the water heater’s operation and status. The default display includes a Burner Firing Rate % Icon for modulating units, a Pump Icon that is visible whenever the integral tank circulator is energized, and Failure Messages if the unit is in an alarm or error condition.
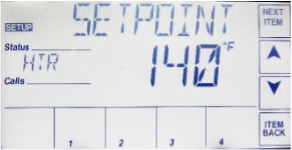
Changing the Operating Set Point (USER Level Access)
The water Conquest water heater operates to satisfy the stored water temperature set point of the EOS control. The value of the controls’ set point is the desired stored tank water temperature. The unit ships with a factory set point of 120⁰F.
Although the setpoint can be displayed in the VIEW menu, it is necessary to enter the Control System Menu in order to make adjustments to the water heater setpoint and other operational parameters.
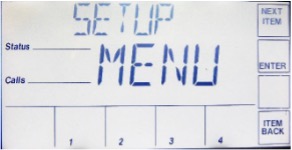
To Change The Water Heater SetPoint
- From the VIEW Menu, press and hold the HOME button for 3 seconds.
- Touch NEXT ITEM or ITEM BACK buttons to navigate to the SETUP
- Touch the ENTER button then navigate to the SETPOINT using the NEXT ITEM
- The new value will be saved when you navigate away using NEXT ITEM, ITEM BACK, or HOME button.
Potentiometer (Operating SetPoint for Standalone Operation)
The PIM Ignition Control will continue to operate the Conquest water heater at a 120 degree internal setpoint should the touch screen control fail, or communication between the two devices is interrupted. This internal setpoint can be adjusted using the potentiometer to maintain a different operating temperature under these circumstances if desired. This feature is intended to be used on a temporary basis, since accuracy of temperature control is dependent upon the touch screen control.
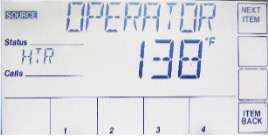
IMPORTANT: It is recommended that at the time of commissioning, the startup technician adjusts the potentiometer to the desired set point displayed in the OPERATOR screen located in the SOURCE control system menu. The standalone set point can be adjusted independently of the touchscreen but a specific setting may be difficult to achieve using the temperature index on the PIM. (See POTENTIOMETER Adjusting the Setpoint.) NOTE: If the operating setpoint is ever changed after initial commissioning, the potentiometer should be readjusted as well.
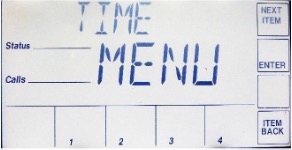
Setting The Real Time Clock (User & Installer Level Access)
The TIME MENU allows the user to program the time of day, the date and the year. Select 12 or 24 hour time clock as well as daylight saving time can be selected. When selected, the time clock can be displayed in the VIEW MENU.
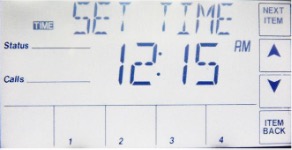
- Press and hold the HOME button for 3 seconds to enter the Control System Menu. Use the NEXT ITEM button to scroll to the TIME menu. Press the ENTER button to enter the TIME
- Use the NEXT ITEM button to move to the first screen. Use the UP & DOWN arrow buttons to set the hour, then press the NEXT ITEM button to enter the value and move to the Once the parameters for the time screen have been entered, move to the date and year screen and enter settings in the same manner.
- ther features that can be configured: display clock in the VIEW MENU, enable daylight saving time , and 12/24 hour clock, use the NEXT ITEM button to move to the correct screen and then the arrow buttons to adjust. Save and exit the menu by pressing the Home button.
Changing the Vent Material Type (ADVanced Level Access)
If the cold inlet water temperature is above 100°F, the use of solid CPVC, Polypropylene or Stainless Steel venting is required and the vent limit switch must be adjusted for the higher temperature rating allowed by these vent materials.
To Change The Vent Type Value:
- From the View Menu, press and hold the HOME button for 3 seconds to enter the Control System Menu. The first menu displayed is the SETUP
- Touch the Next Item or Item Back buttons to navigate to the TOOLBOX
- Touch the ENTER button to display the ACCESS
- Hold #4 button to change to
- Exit the menu by pressing the HOME
- Use the Next Item or Item Back buttons to navigate to the SOURCE
- Enter the SOURCE
- Use the Next Item or Item Back buttons to navigate to the VENT TYPE
- Using the UP or DOWN arrow buttons, select between the four choices: PVC (default setting), PPS, CPVC or
- Exit the menu by pressing the HOME
- Using NEXT ITEM or ITEM BACK, go to the TOOL BOX menu, press Hold #4 button to remove ADVANCED level, use arrows to return to USER level. Hit HOME to exit TOOLBOX menu, hit HOME button again to exit MENUs.
Thank you for taking the opportunity to learn more about the PVI Conquest water heaters. Make sure to check back in next month for part 2. We will get into common maintenance items and basic troubleshooting of the PVI Conquest line of water heaters.
PVI Conquest Water Heater Series